Naturally Dyed Easter Eggs
This egg-dyeing technique uses onion skins and backyard botanicals to create naturally decorated Easter eggs. Simple, sustainable, and beautifully unique, these eggs make a striking addition to any spring celebration.
Equipment
- 1 pair old nylon stockings - cut into 2-inch squares
- Twist ties
Ingredients
- 3 cups yellow onion skins
- ¼ cup white vinegar, plus more for additional dye sessions as needed
- 1 dozen white eggs, plus more as needed
- Botanicals, flowers and leaves
- Vegetable oil
Instructions
- Fill an 8-quart boiling pot with 2 inches of water. Add the onion skins, and bring to a boil. Let simmer for 10 minutes as the onion skins release a rich brown dye into the water. Take it off the heat and let it cool until lukewarm. Add the ¼ cup of vinegar. It is fine to leave the onion skins in.

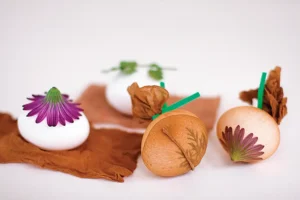
- Meanwhile, start assembling your eggs. Using a selection of botanicals, arrange the leaves and flowers against the egg. Wrap the egg snugly with the nylon and twist-tie, securing the plant design against the shell. You want a good seal, as the plant acts as a mask from the dye.
- Gently add the eggs to your pot of onion skin dye. Add as many as the pot will fit in 1 layer.
- Bring the pot of eggs and dye to a simmer and boil as long as you normally do for hard boiled eggs. I use the method of 3 minutes on a boil with the lid off, take it off the heat and clap on a lid, letting the eggs sit for a further 8 minutes in the dye.
- Using tongs, retrieve the eggs from the dye, set them in a colander and run some tap water over them to rinse lightly and cool them.
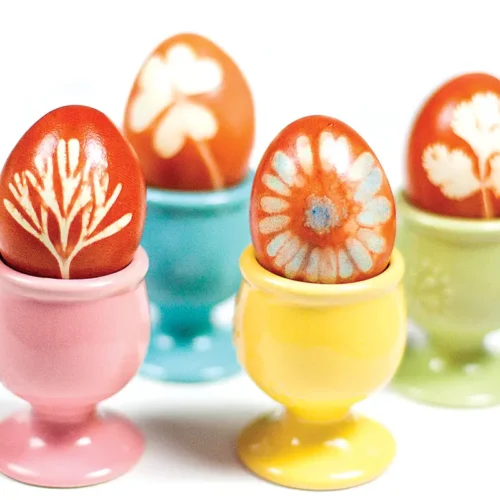
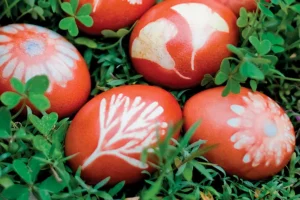
- When cool enough to handle, untie the eggs from their nylon pouches and remove any botanicals that might still cling to the shell. If you’ve used ideal plants, the eggs will be dyed a rich red brown while the parts covered by the plants will stay white. Or perhaps your plants transferred some of their own dyes, like the Freeway Daisy.
- Finally, rub a small amount of vegetable oil in your hands and very lightly coat each egg, to give them a shine.
Notes
Some Tips:
- If you like, keep using the dye for more Easter eggs. With each round, the dye goes into the eggs, so add a handful more onion skins and a tablespoon more vinegar for each round. It is fine to let the dye go lighter as well, it just adds more variety to the eggs.
- The purpose of letting the dye cool is to keep the raw eggs from cracking. If you have a surefire method of adding eggs to warmer liquid, such as piercing the bottom first, you are welcome to try and save a little time. It is helpful if you are making dozens upon dozens of eggs.
- The nylon squares can be hand washed and used over and over, even years later.
- Treat these eggs as regular boiled eggs, and they can be eaten as such. The natural dyes do not impart any noticeable flavor or color to the egg inside.
Nutrition
Calories: 64kcal | Carbohydrates: 0.3g | Protein: 6g | Fat: 4g | Saturated Fat: 1g | Polyunsaturated Fat: 1g | Monounsaturated Fat: 2g | Trans Fat: 0.02g | Cholesterol: 164mg | Sodium: 63mg | Potassium: 61mg | Sugar: 0.2g | Vitamin A: 238IU | Calcium: 25mg | Iron: 1mg